Category: Products
Edges & Borders with Masks
- Wyett Nettles
- 0 Comment
- Posted on
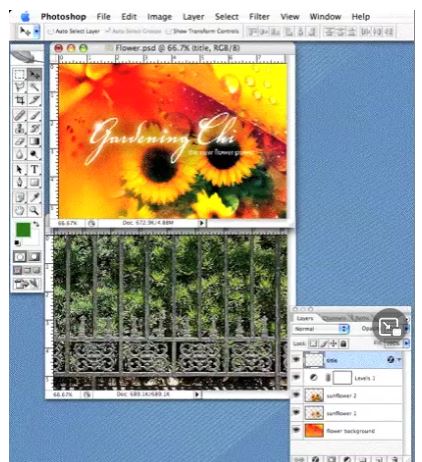
If you want to create a border with a simple white background, all you need to do is create a new screened layer (over your photo ) using one of my edges. But if you want to use a colored background or a textured image, you will have to use a different technique
Step 1
In my example, I opened a Digital Art Paper and cropped it to 8′ x 10″.
STEP 2
Open a image that will utimately receive the new border. Copy and paste it, on it’s own layer, over the background.
STEP 3
Create a mask on layer one by clicking on the mask icon (the second icon from the lower left ).
STEP 4
Option click (PC - Alt click ) on the new mask thumnail to activate it. The window should now turn white.
STEP 5
Open a border, select all and copy it, Return to your tutorial window. Click (CS2 Option Click -PC Alt Click) on the newly created laser mask in the Layers window, and paste.
STEP 6
Select Image>Adjustments> Invert to reverse the border. Remember, black will knock out our image.
STEP 7
Click on the left thumnail within layer 1 to reveal the masked image.
STEP 8
You could stop here but if you want to, you can add layer effects to the mask. Here, I’ve added a drop shadow and a bevel & emboss for some additional effects.
Training On Using the Dodge and Burn Tools With
- Wyett Nettles
- 0 Comment
- Posted on
In previous tip, I applied a watercolor texture to a photograph. and the effect was quite nice. This tutorial goes one step farther. I’ll add dimension to the texture without resorting to airbrushing a tone on top of the texture. By using the Dodge and Burn tools in Photoshop, you can retain the underlying color.
I started with a photograph that I took with my digital camera. I used available light and a little fill with a tungsten flood. No flash.
I could have spent more time with the lighting, but I wanted to demonstrate what you can do with just a good picture.
Using just one Digital Pastel, from my latest collection, I Copied and Pasted Into selected areas of my photograph. You can review this technique in monthly Tip #2.
I could have stopped here, but I wanted to add some dimension to the pears and restore the gradation of the side panel of the tray.
This brings me to this installment - Using the Dodge and Burn Tools.
I cropped in tight for this part of my Tips. Make sure you work in Layers. You’ll have built in masks!
I first wanted to give the left pear some additional dimension. I choose the Burn tool, selected a 50% exposure, and selected shadows from the Burn palette. With the proper layer selected, I burned in shadow. For the highlight, I choose the Dodge tool, selected a 50% exposure, and selected highlight from the Dodge palette.
This is a good example of how airbrushing a lighter tone would have killed the underlying texture.
For the side of the tray, I selected the appropriate layer, and used the Dodge Tool. This time I change the brush size to 300.
The final photo-illustration using the Dodge and Burn technique with Digital Pastels for Photoshop.
How To Perform Blending Mode Exclusion of Photos in Photoshop
- Wyett Nettles
- 0 Comment
- Posted on
If you are like most Photoshop users, you have favorite filters and blending modes, and some that you haven’t even tried. Sometimes, you even scratch your head and ask, “What were those guys at Adobe thinking when they created this feature?”
Well, finally after years of experimentation, I finally figured out what works best for me using the “exclusion” blending mode. If you want a graphic and surreal look, this technique will work for you. I found bright, colorful images work best and dark images won’t have much to “exclude”.


